A Volunteer Experience Recognition Program, PREB-Ontario is a standardized volunteer recognition system facilitated by the Ontario Volunteer Centre Network (OVCN). Once an organization becomes PREB-Ontario certified, they can integrate and populate volunteer information from Charity Republic into volunteer recognition certificates. Click here to view a sample certificate.
Connecting PREB-Ontario and Charity Republic
Connect Charity Republic and PREB-Ontario following these 5 simple steps:
1. Visit the main Organization section (i.e. select your organization’s name along the left-hand side) in Charity Republic
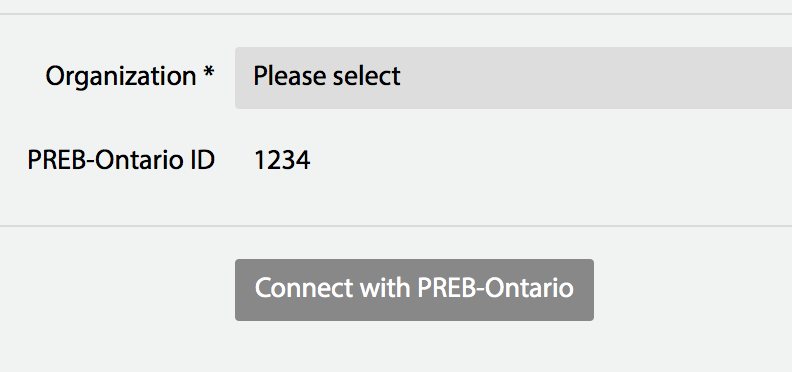
2. Select the PREB-Ontario tab and click the Connect with PREB-Ontario![]() button to open the PREB-Ontario website
button to open the PREB-Ontario website
3. Log in on the PREB-Ontario site and click Admin
4. Under Synchronization Tools, choose Charity Republic Sync (this will take you back to the Charity Republic site)
5. In Charity Republic, choose which organization should be associated with PREB-Ontario and click Connect with PREB-Ontario
Sending Information to PREB-Ontario
Once you have connected the two systems, you can start sending information from Charity Republic to PREB-Ontario to populate certificates. Charity Republic shares the following information with PREB-Ontario:
- First Name, Last Name, Gender and Age Group
- Email, Address
- Organization Name, Position Name
- Total Hours volunteered
To send volunteer information and hours to PREB-Ontario, follow these two simple steps:
1. Visit the main Organization section (i.e. select your organization’s name along the left-hand side) in Charity Republic
2. Select the PREB-Ontario tab and click the Send to PREB-Ontario ![]() button
button
After sending volunteer information and hours, you can issue certificates for volunteers from within PREB-Ontario.
To learn more about Charity Republic’s partnership with the OVCN, read more here.
To become PREB-Ontario certified or to learn more about the certificate program, please contact the OVCN here.