Linking two accounts

Q: How can I connect (or link) two accounts together?

A: To connect two or more accounts, please follow the steps below:

1. Ensure you are logged into your main account.
2. Accept the email invitation or Send (“Save and Invite”) and Accept the invitation from the user profile you wish to connect your main account to (refer to relevant FAQ).

Once accepted, the new account will automatically connect to your main account.

TIP: To switch between accounts, either click directly on the left toolbar, or use the drop-down in the top left corner of your dashboard.

Colour Coding the Schedule

Q. What are the different colours that appear on the schedule?

A.  There are 4 colours that will show when you are scheduling volunteers on the calendar depending on the positions that have been filled for each shift.

  • Events without positions = grey
  • All positions have been filled = green
  • Some positions have been partially filled = orange
  • There are no positions that are filled = red

Bulk Inviting Volunteers

Q: Can I invite multiple volunteers to register with Charity Republic at once?

A: Yes, administrators have the ability to send a batch invite selected volunteers.

– Select the batch button on the main Volunteers tab (top right)
– A list of all active volunteers will appear with the option to check markselect all the volunteers you would like to invite
When you have checked off all of the desired volunteers, click the send button in the top right to send out email invitations

Removing or Deleting Volunteers

Q: How do I delete a volunteer from Charity Republic?

A: To delete a volunteer:

– Select the delete buttob button in the volunteer’s profile (top right)
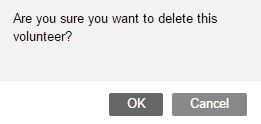
– A confirmation pop-up box will appear
Click OK to delete the profile
confirmation

NOTE: Once a volunteer’s account has been deleted, all of the information associated with the profile will also be deleted.

Q: Can I disable access for a volunteer but still keep their demographic information?

A:  Yes, you have the ability to revoke access for a volunteer so that they no longer have the ability to log in or view/edit their profile.

– Select the revoke access button in the volunteer’s profile (General tab)
– A confirmation pop-up box will appear
Click OK to revoke the volunteer’s access

NOTE: By revoking access for a volunteer, a volunteer will no longer be able to log into their account, but you will still be able to view and edit their profile.

Availability

Q: Is there a way to track a volunteer’s availability?

A: An organization can track detailed availability for scheduling via the Availability section (in a volunteer’s profile).

1. Select Availability icon availability (along top of volunteer’s profile)
2. Select Plus symbolsymbol (top right) to track new availability
3. Select the dates range and select if that the volunteer is available or unavailable.
avai vs unavai
4. Use the Description to add any specific comments or notes about the times the volunteer can be scheduled
5.  Click the Timeslots on the left to indicate the different days and times they can volunteer
7. Make sure to click Save! Save button

NOTE: You can run a report on the availability of all your volunteers.

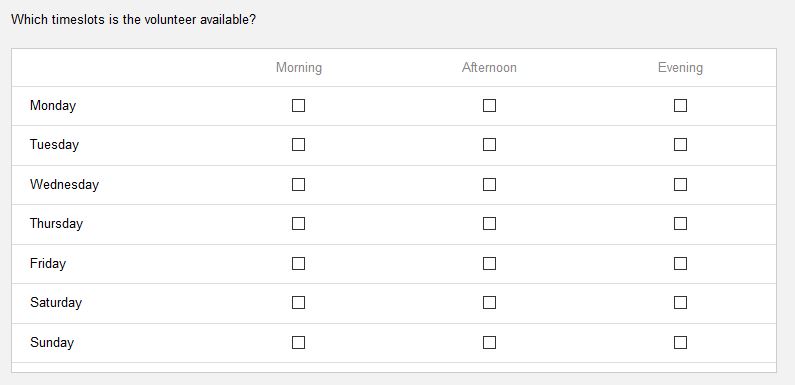
You can also add a more general date ranges to indicate whether a volunteer is available or unavailable. Under time slots you can indicate the different times a volunteer is available (i.e. Monday Morning, Tuesday Afternoon)

timeslotsss

NOTE: Morning is considered anytime before 12:00PM. Afternoon is from 12:00PM-6:00PM. Evening is anytime after 6:00PM.


Clients

A client is defined by your organization. For instance, a client could be a refugee family or a client could be a senior who received visits from volunteers.

Q: How do I add a new Client?

A: Visit the main Organization tab (i.e. select your organization’s name along the left-hand side) Happy Good Charity Centre to set up your organization’s Clients.

  1. Select the Clients icon along the top clients
  2. Select thePlus symbolbutton (top right) to add a new client or group (e.g.
  3. Enter the Name of the client, company or group
  4. Attatch any Addresses, Contacts or Notes to a client
  5. Save buttonthe information

NOTE: The start and end date in the organization section represents the dates they were a client with the organization.

Q: How do I link a Volunteer to a Client?

A: Visit the main Volunteers section Volunteers Tab and select a volunteer.

  1. Select the Clients icon clients(top)
  2. Select thePlus symbolbutton (top right) to select or assign a new client
  3. Select a Client from the drop-down (this client would have been created via the Organization section)
  4. Add the start and end date if applicable
  5. Save buttonthe information

NOTE: The start and end date in a volunteer profile represents the dates they were assigned to a client. You can add and attach an unlimited number of Clients to a volunteer. Simply select thePlus symbolbutton (top right) to add another client.

Volunteer Data Upload Template

Instead of adding volunteers manually one-by-one, we can upload a volunteer list for you.

  • Click here for the template (available in Google Docs)
  • Select File
  • Select Download as > Microsoft Excel

data uplaod form

Fill in the details and send it back to info@charityrepublic.com. We will upload the password protected volunteer information to your account.

NOTE: If you are unable to access this file via Google Docs, then we can email you a copy in Excel format.

Icon Guide

Icon Name Description
plus Create/New “+” (plus) symbol is used add something new (e.g. new volunteers, new shift, new opportunity)
help Help Menu A question mark will appear on all pages as a help menu for the page. Click to review.
message Messages/Inbox Communicate with your volunteers in the messaging section. Select the Message icon > select the “+” symbol to compose a message > select the recipients > enter a subject and message > and hit Send.
notifications Notifications Notifications appear here, including shift requests, hour submissions, birthdays and anniversaries.
Availble Positions Positions Add or assign positions within your organization here.

Select the: Department, Site, Supervisor and Description associated with the position

Or, select the opportunity that the position is associated with in order to create a position within the system.

Site icon Sites Add sites and include general information such as name of the site, a description, address information and contact information for the site.
Attatchments Attachments


Add attachments here, such as a volunteer’s resume.
Comments and Notes section Comments/Notes


Add private or open notes here.

Notes are by default private so only Administrators and Supervisors can see the note.

These is the option to make the comment viewable by a volunteer.

 Hours Hours A volunteer or volunteer manager can add hours, either as a shift or block of hours. Add a description and skills learned then Save or “Save and Submit” hours for approval.
 Achivemnetsd Achievements Add Achievements for a volunteer including police checks, certifications and awards. Create custom achievements via the Organization tab.
 Scheduled Volunteers Scheduled Volunteers View scheduled volunteers and whether they accepted or declined a shift.
 Availble Positions Available Positions Indicates how many volunteers are needed and how many volunteers are scheduled and confirmed their shift.


Emergency Contacts

Q: Can I add an emergency contact for a Volunteer?

A: Yes, you are able to add multiple contacts for a volunteer including an emergency contact(s).

  • To add a new contact, select a volunteer, then select the Contacts tab in the volunteer’s profile
  • Click add contact, then select the contact type (Emergency) from the drop down menu. Add the contact name and relevant contact information (e.g. phone number, email address) Emergency

Attachments

Q: Can I attach a file to a volunteer’s profile?

A: Yes, you are able to add multiple attachments (e.g. photos, resumes) to a volunteer’s profile in the Attachment section as well as in the Achievements section.

  •  To add a new attachment, select a volunteer, then select the Attachment icon Attatchmentsor Achievement icon Achivemnetsd
  • Click the plus symbolPlus symbolto add a new attachment in the Attachment section Attatchments OR select the Attachments tab in the Achievement section Achivemnetsd
  • Select the Choose File button to add the desired attachment and add a brief description about the attachment
    choose attatch

NOTE: There is no storage limit for attachments, although an individual attachment (i.e. one file) must be under 25MB in size.